Friday 28 September 2012
Hello everyone! I am terribly sorry for missing my Wednesday blog post, but you have no idea how busy I have been. I have Uni assignments and I also have to babysit, but anyway, you don't care about my life. For this Friday's post I will be sharing a small, collective haul.

Today I went to the Mall with my sister and we bought some Gosh cosmetics from BeautyLine. A nail varnish base coat called 565 Fix Base Coat that costed €6.50 and an Oh My Gosh Nail Lacquer in 032 Splish Splash that was €4.60. Then my sister picked out a Velvet Touch Eye Liner in 001 Blue Moon, which I believe costs around 9 euro. The last Gosh item is a lip gloss in 0084, which I think costs less than 8 EUR.

Something else that I purchased was the Feminine Eyeshadow palette from Urban Decay found at http://www.thecosmetichouse.co.uk/ . I am so excited for this product, because it is my first purchase from this brand. A full review on this makeup palette is coming as well as a makeup look. In this palette you get six eyeshadows Stray Dog, Swf, Midnight Cowboy, Aquarius, Darkhorse and Ecstacy. Also, you get sample sizes of a 24/7 Glide-On Eye Pencil in Zero and an Eyeshadow Primer Potion in Eden.

Here you can see me wearing the Gosh Lip Gloss which is a bit sticky and you can feel some shimmery particles, but I really love the colour. This is as nude as I get before looking ill. On my lower lash-line I have the Blue Moon Eyeliner. The rest of my face is makeup free.
Thank you for reading my post and don't forget to follow my blog for more! Love, Gina :)
Monday 24 September 2012

Hello everyone! I almost forgot that it's Monday today, and I wasn't going to post anything. Anyway, I recently bought two things from Bershka and I was debating whether I should blog about it. But then on Saturday, I went to this party and I had combined the two items in my outfit, so when I came home I decided to film an outfit video. One's a pair of light washed jeans that costed me 10Euro. Can you believe it, ten euro?! The other is a pair of plain, tan coloured flats that were 20 euro. As my top I added the short dress from my Marks & Spencer haul and added a tan belt with bow detailing from Ebay, that matched my shoes. In case the night gets cold I have a black cardigan with me. To finish my outfit I've added some gunmetal, blue pearl bracelets to my wrist, and that's it! I hope you liked my video and my blog post! What do you love wearing for fall / autumn?
Friday 21 September 2012
Hello everyone and I hope you are all doing well! For my last blog post of the week I've decided to share with your beautiful souls my current go-to beauty products. These are the cosmetics that I have been using everyday to get ready in the morning for University. Let's start by saying how I want to look for uni. I want a routine that takes a couple of minutes and I really don't want to look like I'm wearing any makeup, especially since the other girls in my class don't look overdone.

I start by applying my Aloe Vera Day Cream from LR, because my skin is normal to dry and this moisturizer is amazing for dry skin. This product is under 20 Euro. I skip foundation because when you are a perfectionist like me it takes forever to blend and I really don't have a lot of blemishes. Instead I use concealer to cover up any darkness under the eyes, around the mouth, redness on my cheeks and the veins on my eyelids. I am currently using Select Cover Up Concealer in NW20, which is a good match for me, maybe it would have been better if it were an NW15. I apply the concealer with an E25 brush from Sigma. I believe I paid about 18euro for it. After that I set the concealer with a tinted loose powder from LR with the same brush, focusing on the eye area, because the concealer will crease if not set properly. The powder has the old packaging and if you were to buy it today, you would pay 15euro.
Wednesday 19 September 2012
Hello everyone! I hope your day has been great! For this Wednesday's blog post I've decide to share with you my current Makeup Art Cosmetics wishlist, but I am going to split it into parts. This is part 1 with the lipsticks that are on the top of my wishlist. So let's begin!
I don't really have a big collection of Mac Lipsticks, but I own a couple of Satins and a Frost. I prefer the frost finish, rather than the satin which can be drying on your lips. A lot of people say that the Cremesheen finish is great because it's moisturising. I personally haven't had the chance to try one on my lips, however, it's on my to-do list. First lipstick from the cremesheen finish category that I really want to try out is Crème Cup, a lip product that so many people love and recommend. They say it's the perfect everyday shade, perfect for any occasion. Also, it is described as a light blue pink on the mac website, which means it should make teeth appear whiter, and that is something I look for in a lipstick's colour. Have you tried this product?
Another lipstick that I really want to test is Impassioned. Amped-up fuchsia is the description for this lipstick on the website and it looks gorgeous. I love bright lipsticks and this one looks like a great one. Also, there's a lot of hype about Hue, which is a soft pale pink that has a Glaze finish, which I've never tried. I'm not sure about this one though, I'm afraid it might be a bit too nude for my pale skin and make me look sick. In addition, Viva Glam Nicky looks like a fantastic colour, although being described as a bright yellow pink worries me that it may make my teeth look more yellow. Lastly, Ruby Woo looks fantastic and it's described as a very matte blue-red, which means two things. First, it's going to be drying on the lips, but the staying power should be incredibly long and secondly, it will make teeth look whiter, which is always a bonus. That's enough lipsticks for one night!
Which Mac Lipsticks do you own and what do you think about them?
Love ya, Gina :)
Monday 17 September 2012
Hello there and welcome to my blog! I hope you enjoy your stay :)
For this Monday's blog post I am sharing this nail art design I did on Friday, because of a recent purple nail varnish purchase.

Here you can see what I came out with. There's quite a lot of a gradient effect going on. I love purple for fall and this shade is just amazing. I can see it been featured in my September favourites. Yes, I'll finally make a favourites video! I'm sorry I didn't do one for summer as I had promised.

Here we have all the items I used for my nail care and design. I started off with a clear polish as my base and moved on to three coats of the new purple varnish I mentioned. The Leciel Paris Nail Varnish in Purple. I know, such an original name! But it suits the product well since it's a true purple, not too warm, not too cool. The bottle is so small and cute as you can see from the pictures and the brush is good too. I paid 5 euro for it. The varnish could be amazing with just one coat, but I wasn't applying enough so I needed three to make it look perfect. Now on to the gradients. For my ring finger and thumb I started with OPI's Save Me Nail Lacquer on an eyeshadow sponge, shown in the picture above. Can we please take a moment and say how beautiful this product is? I love glitter polishes and this is definitely one of my favourites! Okay, let's move on. After that I uses a light purple/lavender shade to make another gradient on top of the OPI one and going a bit further down. Then I reapplied the OPI Save Me just on the tip of the nail, again by using an eyeshadow sponge. Now, to my index finger I only did the lavender gradient/ombre effect, without any glitter. I finished the design with some top coat and that's it. I hope you like my post and if you do, please let me know! If you would like me to film the process somewhat explained above, please do tell me. I hope your week will be beautiful, just like you!
Friday 14 September 2012
Hello everyone! Today's blog post is a makeup tutorial. Yes, finally, a new video! I am so sorry, but I've been crazily busy to edit videos. Anyway, I wanted to create a transition look from summer to fall using the Paris Makeup Palette from Sigma. The eyeshadows I used were Versailles, a shimmery ivory, Elysées a shimmery medium brown and Louvre, a satin blue. The blush was Rouge and Lumière was my highlight shade. I used Gosh Serious Volume Mascara, Gosh Velvet Touch Lipstick in 122 Nougat and Myth Mac Lipstick. The rest products will be shown in the video. I hope you like my video! Good night, Gina :)
p.s. excuse the horrible thumbnail.
Wednesday 12 September 2012
Hi everyone! For my Wednesday blog post I am reviewing the lipstick 150 Kitten Pink from the cosmetics company Gosh. If you have visited my blog before, you might have noticed my obsession with Gosh makeup or you might have seen the haul I posted a while ago mentioning this product.

So, I have to admit this was more of an impulse buy, rather than something I've had my eye on for a while. When I came home and tried it on my lips I was a bit surprised at how bright the lipstick actually is. It's a very confusing colour, to be honest. The colour is a true pink, not much of a blue undertone, although some times it looks fuchsia or magenta depending on the lighting. It's definitely not the best everyday colour, but still it's not really a statement lipstick.

As always, in the first picture on the left my lips are completely bare and the rest are just pictures with the same amount of lipstick just in different lighting. This product is very moisturising, like all the Gosh lipsticks I own, but it kind of feels even more moisturising. I find that the glossy feeling of it fades quite easily by drinking or eating something. When that gloss leaves the lipstick has sort of stained your lips with a very pretty fuchsia/magenta colour, that doesn't fade easily nor is drying. Of course if you brush your teeth it will completely fade away.
So, I hope you liked my post and if you did, why won't you tell me with a comment?
Also, I hope you appreciate me staying home and writing this post rather than going to my Uni's Welcome Party! I'm just kidding, I wasn't able to go anyway! Good Bye everyone! Love ya, Gina :)
Monday 10 September 2012
Hello everyone! I hope that your day has been wonderful! Today as I came home back from Uni, I decided to film the "No mirror makeup challenge". I gathered all the products I'd need and started filming it. It was such a strange experience and the results were not what I expected. First of all, I felt like I wasn't applying much foundation, but soon you will see how cakey my makeup looked. In addition, I was expecting a thin line of eyeliner, but again I was surprised with multiple thick lines and believe it or not a winged liner effect!

Here you can admire my impressive makeup skills! I realise, I may seem sad in the pictures and there's a reason to that. As I've previously mentioned, I was recording the process of applying my makeup without a mirror and I was satisfied with it. I really could not wait until watching the footage I had recorded, but my beloved camera basically got stuck when I clicked the stop button. I waited and waited and waited, but nothing happened. So, I decided to simply remove the battery and connect it to my computer. The file wasn't able to open with any of my programmes. LOVELY! Twenty minutes of my crazily busy schedule gone. I was so upset, because I was really looking forward to editing and uploading the video. I thought it would be enjoyable and maybe a bit entertaining. Maybe I will attempt another no mirror makeup challenge video soon. Would you like to watch a video like that?
Thank you for reading,
Goodnight!
Georgia :)
Saturday 8 September 2012
Good morning everyone! I am terribly sorry for not posting anything yesterday as I had promised a new blog post every Monday, Wednesday and Friday. Lately, I have been terribly tired, because I've recently started my first year of University studying Multimedia and Graphic Arts and my schedule has been horrible. Don't get me wrong, I love my Uni so far, it's just incredibly tiring. Anyway, let's move on to the blog post.

Today I am going to share with you my new and improved makeup storage. Do you remember my nail polish storage post? I mentioned there that I had gotten a new organiser from IKEA for my cosmetics.
So here is what it looks like now. I had to change my makeup drawer since the one organiser I purchased was too big to fit the one I was using. I moved my collection to another furniture from IKEA. In addition, I kept a grey organiser I bought from a book shop for my lip products.
Wednesday 5 September 2012

Hello everyone! I hope you're all well.
This blog post will teach you the way I fix my cracked or broken eyeshadows. This method also works with blushes and basically all pressed powders.


This blog post will teach you the way I fix my cracked or broken eyeshadows. This method also works with blushes and basically all pressed powders.

This post wasn't planned, I was just moving my makeup and found my Mac Carbon Eyeshadow cracked. Nothing that big as you can see from the picture above.
Firstly, you want to spray some rubbing alcohol onto the eyeshadow and then use a cotton tip applicator to press the part of the cracked eyeshadow.

And this is how it looks!

Now, to make sure the shadow is pressed and secure spray some more rubbing alcohol and press it down with a clean finger. Using a tissue to press is also a great idea, since it would absorb the excess moisture as well as pushing the pigments together.

And that is it! I hope I have help you in some way :)
Goodbye!
Monday 3 September 2012
Hello everyone and welcome to one more BeautyInsideArt blog post! Today I am going to share how I've recently organised my nail polishes / varnishes / lacquers. On Saturday, I went to IKEA and purchased a drawer separator/organiser in order to be used for my makeup collection. A blog post on that is coming soon. So, I used what I bought and I was left with another smaller organiser that I used to have my makeup essentials. So after some time thinking about how I could use the item, I decided it would be a lifesaver in my nail stuff drawer.

This is how messy my nail things looked before organising them. It was really horrible and I hated it.

This is the organiser that I used, found at a local shop called Jumbo.
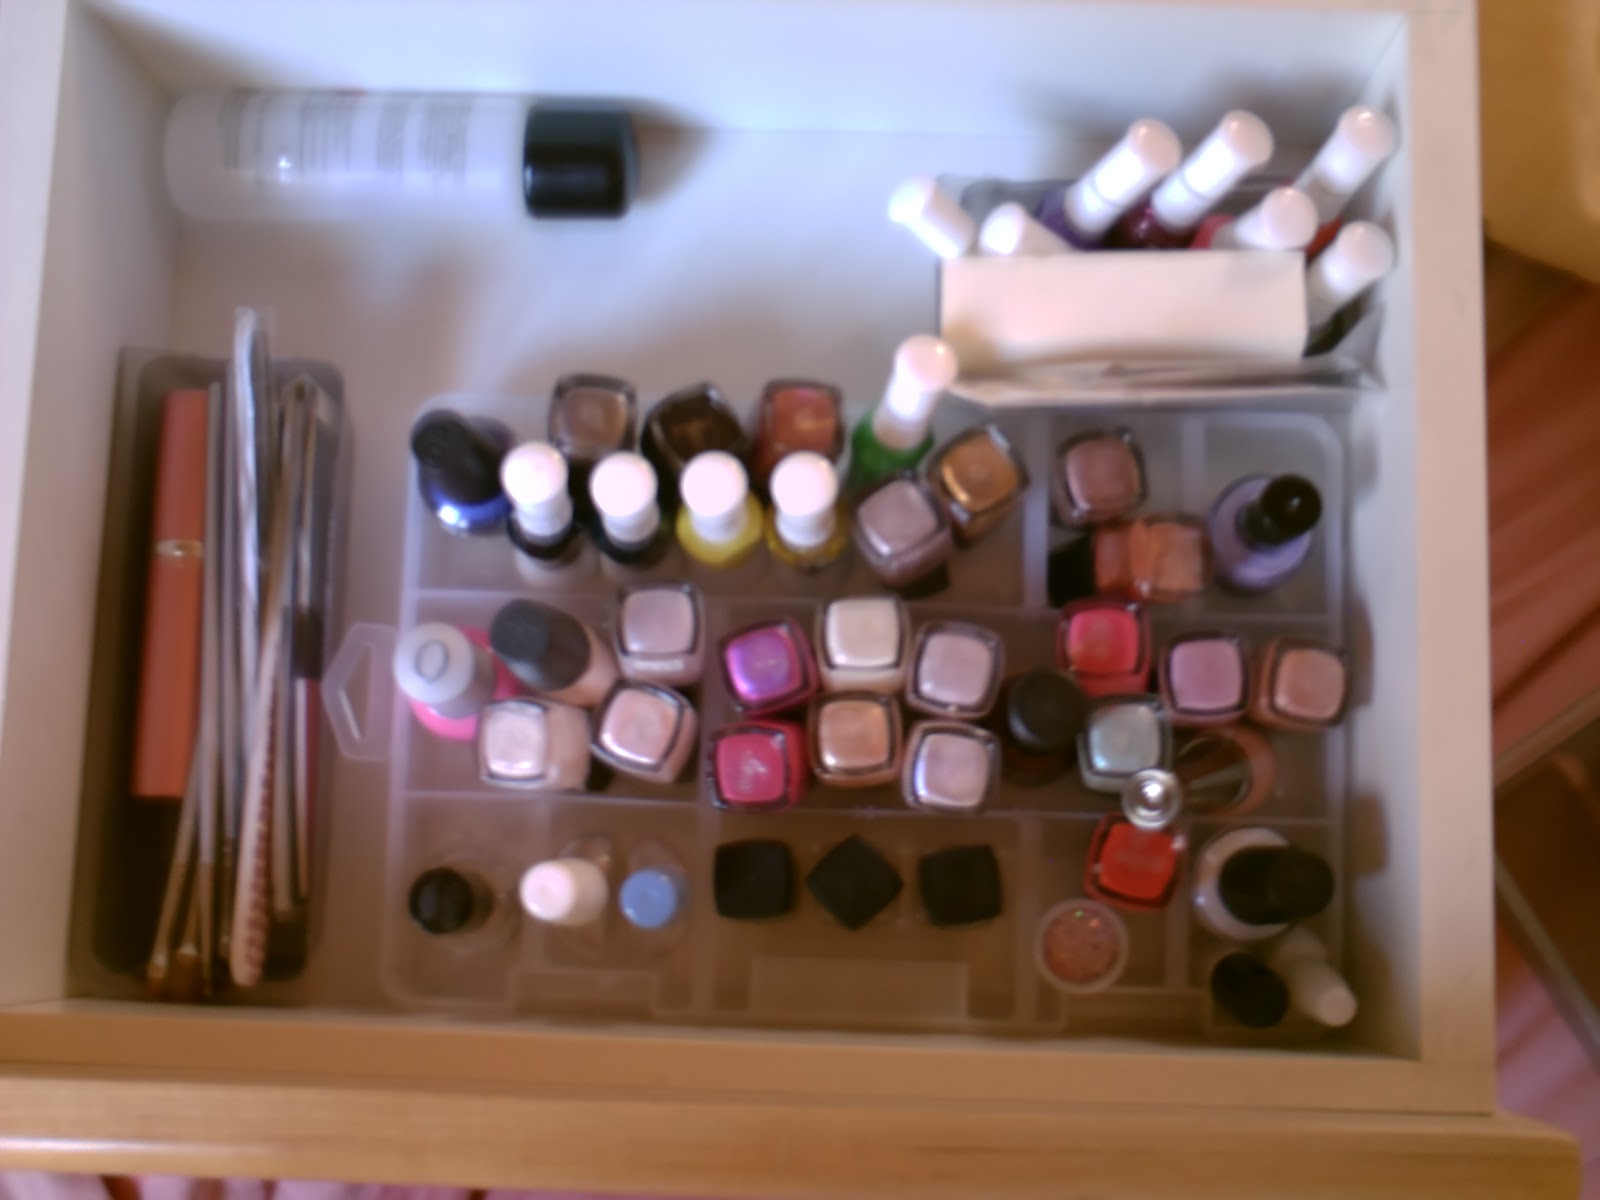

And this is how it looks after adding some more products. Do you think it looks organised? What are your organising tips? Trust me, I need them! :)


